5MP7251.101P-000 Membrane Keypad MMI Touch Screen
- Model
- 5MP7251.101P-000
Item specifics
- Brand
- B&R
- Size
- 10.1 inch
- Model
- B&R Mobile Panel 7200 5MP7251.101P-000
- Shipping
- DHL/FedEx/UPS/TNT/EMS/Aramex /DPEX
- Warranty
- 1 Year VICPAS Warranty
Review
Description
B&R Mobile Panel 7200 5MP7251.101P-000 Touch Screen Panel Membrane Keypad Repair
Order each part separately is available

The 5MP7251.101P-000 Membrane Keypad Switch Touch Screen Glass Mobile Panel is a portable operating and display device with a rugged design. Equipped with powerful processors and Ethernet technology, the 5MP7251.101P-000 Touch Membrane Operator Panel Keypad Mobile Panel is optimally suited for a wide range of applications.
All tasks can be solved graphically with the color display. The 5MP7251.101P-000 Touch Screen Panel enables intuitive user guidance.
Ergonomics
• Functional multigrip
• Rounded housing
• Desktop operation
• Wall mount operation
• Easy-to-read display
5MP7251.101P-000 uses a projected capacitive multi-touch screen.
The 5MP7251.101P-000 HMI Touch Glass can be operated with one or more fingers (with or without gloves). The following operation guidelines should be observed to ensure long life of the 5MP7251.101P-000 HMI Panel Glass:
• The 5MP7251.101P-000 Touch Digitizer Glass is not permitted to be operated with gloves or other suitable operating devices if they have been contaminated with chemicals or hard, sharp-edged substances (e.g. sand, grinding paste, metal cuttings of all kinds).
• The 5MP7251.101P-000 Touch Screen Monitor is not permitted to be operated with pointed, sharp metallic objects (e.g. screwdrivers) or with ballpoint pens or pencils.
• The 5MP7251.101P-000 MMI Touch Screen is not permitted to be exposed to continuous sunlight.
Mobile Panel 7251 - Membrane keypad
How keys/LEDs are assigned depends on how they will be used by the customer.
Some keys are preconfigured at the factory. The key configuration can be changed in a text file and transferred to the device using the ADI Control Center.
The states of the keys or LEDs can be read or switched by a program using the Automation Device Interface (ADI library).
Specifications:
The table below describes the parameters of the 5MP7251.101P-000 Mobile Panel 7200 Membrane Keypad Switch Touch Panel.
| Part Number: | 5MP7251.101P-000 |
| Product Line: | Mobile Panel 7200 |
| Screen Diagonal: | 10.1 in |
| Warranty: | 365 Days Warranty |
| Display Colors: | 16.7 million |
| Display Type: | TFT color |
| Display Resolution: | WXGA, 1280 x 800 px |
| Backlight Brightness: | 400 cd/m² |
| Touch Screen: | Projected capacitive |
| Storage Temp.: | -25 to 70°C |
Related B&R Mobile Panel 7100 Series Part No. :
| B&R Mobile Panel 7100 | Description | Inventory status |
| 5MP7120.034F-000 | B&R Mobile Panel 7100 Operator Keyboard HMI Panel Glass | In Stock |
| 5MP7121.034F-000 | Mobile Panel 7100 Keyboard Membrane Touch Screen Monitor Repair | Available Now |
| 5MP7140.070N-000 | B&R Mobile Panel 7100 MMI Touch Screen Switch Membrane Replacement | In Stock |
| 5MP7150.101E-000 | Mobile Panel 7100 B and R HMI Terminal Keypad Touch Digitizer | Available Now |
| 5MP7151.101E-000 | Mobile Panel 7100 Touch Screen Keyboard Membrane Repair | In Stock |
| 5MP7151.101E-001 | B&R Mobile Panel 7100 Touch Panel Membrane Keypad Keyboard | In Stock |
| B and R MP7100 | Description | Inventory status |
B&R Mobile Panel 7200 Manuals PDF Download:
FAQ:
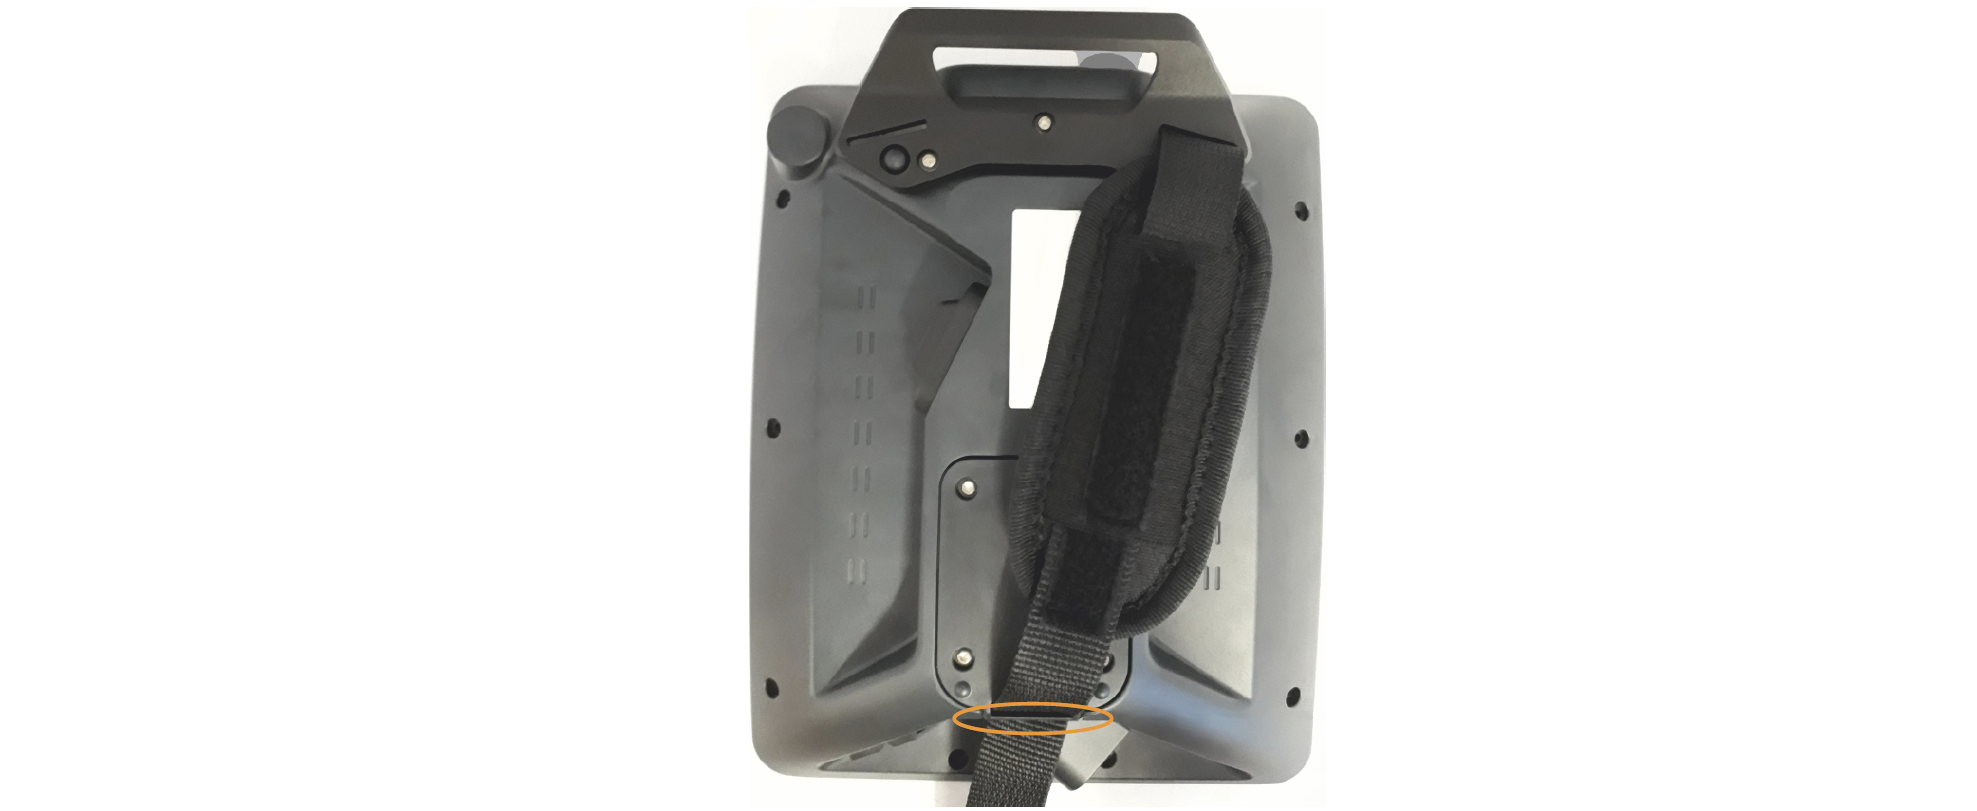
Question: Installing the 5MP7251.101P-000 handle and hand strap
Solution:
To install the handle and hand strap, the MP7200 must be placed with the display facing downwards. The surface used for this must therefore be flat, clean and as soft as possible to avoid damaging the device.

If the hand strap is not required, only assembly steps 1 to 3 and 7 described below are necessary.
1. Switch off the supply voltage.
2. Disassemble the handheld control device.
3. Place the handheld control device with the display facing downwards on a suitable surface or base.
4. Feed the non-welded end of the hand strap belt (1b) through the right opening on the handle (2a). The hook and-loop fastener must be facing upwards.

If the MP7200 is mainly held with the left hand, it could make more sense to install it on the left-hand opening of the handle (2b).

5. Pull the entire belt of the hand strap through until the welded end (1a of the figure in step 4) is stopped by the opening on the handle.
6. Attaching the upholstery (optional). The hook-and-loop fastener must be facing upwards (1).

7. Tighten the handle with a screwdriver (torque: 0.8 - 1.0 Nm) at the top of the handheld control device.
8. Feed the hand strap through the opening at the bottom of the handheld control device (1).

9. Pull the hand strap belt through until a tight but comfortable hold is achieved.
10. Close the hook-and-loop fasteners.
✓ The handle and hand strap are now completely installed and ready for use.
Common misspellings:
5MP7251.101P-00
5MP7251.11P-000
5MP7215.101P-000
5MP7251.1o1P-000
5MP7251.101P--000


