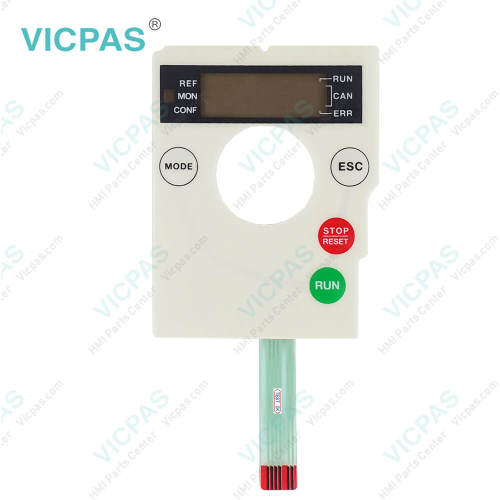
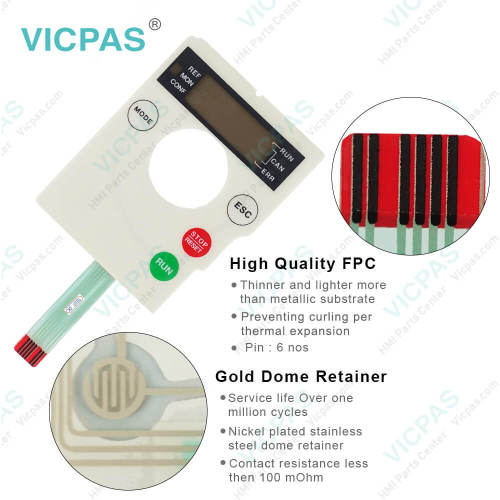
ATV312HU15M2 ATV312HU15M3 Membrane Keyboard Keypad
- Model
- ATV312HU15M2 ATV312HU15M3
Item specifics
- Brand
- Schneider
- Warranty
- 365 Days
- Supply
- ATV312HU15M2 ATV312HU15M3 Membrane keypad keyboard
- Product Line
- Schneider Altivar 312 Series
Review
Description
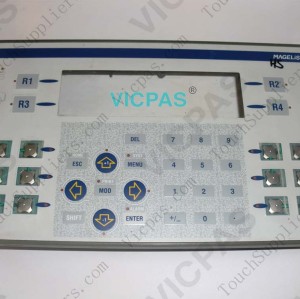
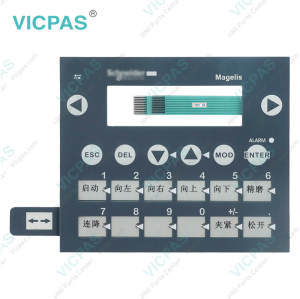
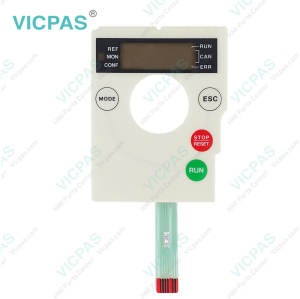
Schneider Altivar 312 ATV312HU15M2 ATV312HU15M3 HMI Membrane Keyboard Keypad Repair Part

The DeviceNet communication card (catalog number VW3A312 09) is used to connect an Altivar 312 ATV312HU15M2 ATV312HU15M3 Membrane Keypad Keyboard Terminal drive to a DeviceNet network. The communication card has an open-style 5-pin connector for connection to the network. Data exchanges give access to all Altivar 312 ATV312HU15M2 ATV312HU15M3
Keyboard Membrane HMI functions:
• Command,
• Monitoring,
• Diagnostics.
The Altivar 312 ATV312HU15M2 ATV312HU15M3 Terminal Keypad drive is designed to make industrial and commercial machines more energy efficient, while at the same time simplifying its integration into a single control system architecture. With the highest overtorque and the only drive with a remote graphic keypad in its class, the Altivar 312 ATV312HU15M2 ATV312HU15M3 Keypad Membrane HMI drive is ideally suited to the needs of material handling, packaging, food & beverage, pump & fan, and other OEM machines. It also comes standard with integrated communications port for Modbus and CANopen networks, and optional cards for CANopen Daisy Chain, DeviceNet and Profibus DP.
Specifications:
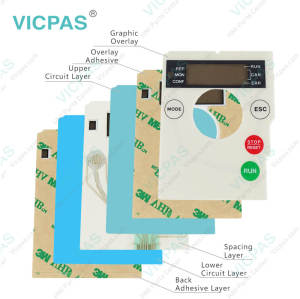
The table below describes the parameters of the ATV312HU15M2 ATV312HU15M3 Schneider Membrane Keypad Switch.
| Part Number: | ATV312HU15M2 ATV312HU15M3 |
| Analogue Inputs: | 3 |
| Analogue Outputs: | 1 |
| Warranty: | 365 Days Warranty |
| Material: | Polyester or Polycarbonate |
| Output Frequency: | 0.5 to 500 Hz |
| Operating Temp.: | -10° to +50° C |
| Storage Temp.: | -25...70 °C |
| Conductive Trace: | Silver or Copper |
| Life Cycle: | 5 Million Cycles(up to) |
Related Schneider Altivar 312 Series Part No. :
| Schneider Altivar 312 | Description | Inventory status |
| ATV312H037M2 | Schneider Altivar 312 Operator Keyboard Repair | In Stock |
| ATV312H037N4 | Altivar 312 Schneider Keyboard Membrane Replacement | Available Now |
| ATV312HU11M2 | Schneider Altivar 312 Switch Membrane Repair | In Stock |
| ATV312HU11M3 | Altivar 312 Schneider HMI Terminal Keypad | Available Now |
| ATV312HU11N4 | Schneider Altivar 312 Keyboard Membrane Repair | In Stock |
| ATV312HU15M2 | Schneider Altivar 312 Membrane Keypad Keyboard | In Stock |
| ATV312HU15M3 | Schneider Altivar 312 Switch Membrane Repair | In Stock |
| ATV312HU15N4 | Schneider Altivar 312 Membrane Keypad Replacement | Available Now |
| ATV312HU15S6 | Schneider Altivar 312 HMI Switch Membrane Repair | Available Now |
| ATV312HU22M2 | Altivar 312 Keyboard Membrane Replacement | In Stock |
| ATV312HU22M3 | Schneider Altivar 312 Membrane Keypad Keyboard | In Stock |
| ATV312HU22N4 | Schneider Altivar 312 Switch Membrane Repair | In Stock |
| ATV312HU22S6 | Altivar 312 Schneider HMI Terminal Keypad | Available Now |
| Schneider Magelis ATV312 | Description | Inventory status |
Schneider ATV312 HMI Manuals PDF Download:
FAQ:
Question: How to install the card in the Schneider ATV312HU15M2 ATV312HU15M3 HMI Terminal drive?
Answer:
Install the card in ATV312 as follows:
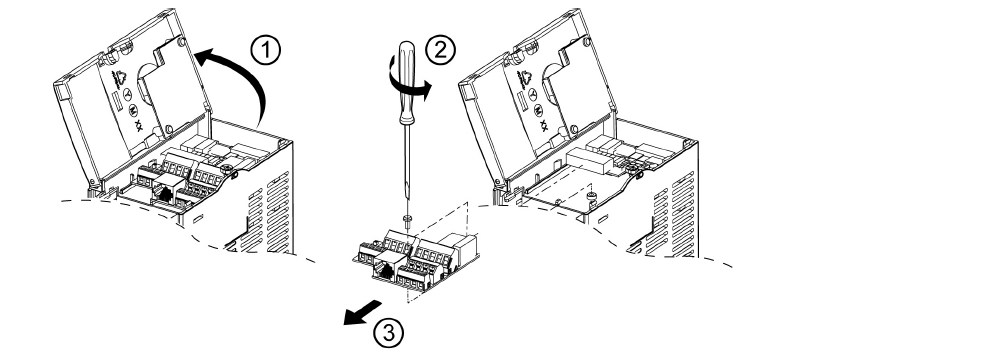
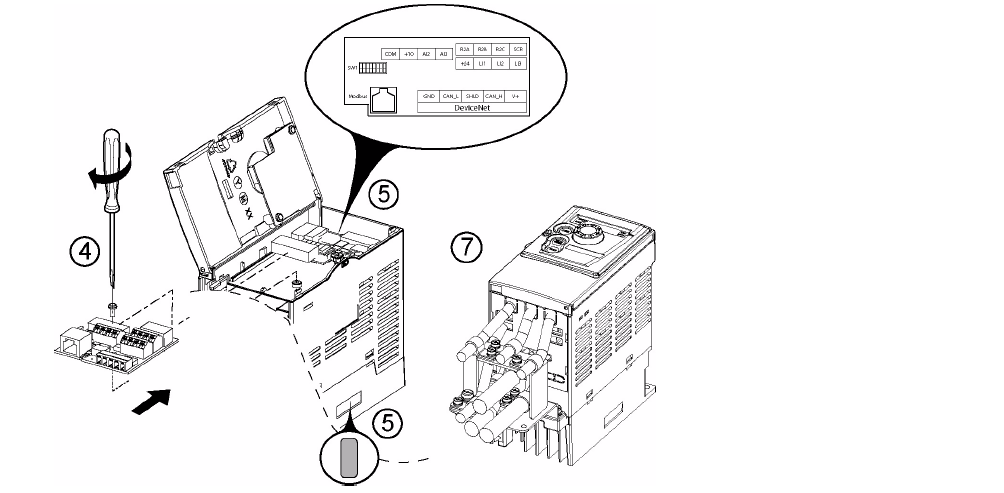
1. Open the ATV312 front cover.
2 & 3. Remove the terminal board fixing screw and take off the ATV312 standard terminal board.
(Be careful not to lose the terminal board fixing screw when removed since it may be used again.)
This step does not apply if you are using an ATV312.... B (product without standard IO terminal).
4. Install the DeviceNet card and secure it with the board fixing screw.
(M3 tapping screw tightening torque: 0.7 to 0.8Nm)
5. Stick the new cabling label above the DeviceNet option card.
Stick the DeviceNet card nameplate near the ATV312 nameplate. (Be careful not to cover slits on the ATV312 enclosure)
6. Perform wiring on the DeviceNet card.
7. Wire and screw the EMC clamps for the DeviceNet cables (and control wires if required).
Note: To install or remove the terminal board, make it slide in or out in parallel with board.
Question: Is the keyboard of the ATV312HU15M2 ATV312HU15M3 unit replaceable?
Answer: Yes, the membrane keypad of ATV312HU15M2 ATV312HU15M3 can be replaceable.
Common misspellings:
TV312HU15M2ATV31HU15M2
ATV312HU51M2
ATV3l2HU15M3
ATV312HU15MM3
ATV312HU115M3