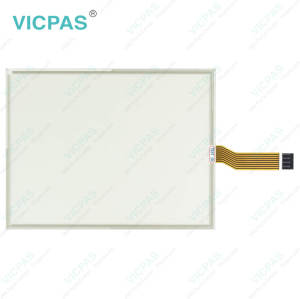
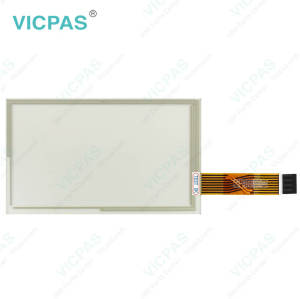
CASE IH AFS PRO 1200 Display Touch Screen Panel Repair
- Model
- CASE IH AFS PRO 1200 Display
Item specifics
- Brand
- Trimble
- Warranty
- 365 Days
- Product Line
- CASE IH AFS PRO 1200 Display
- Supply
- CASE IH AFS PRO 1200 Display Touch Screen Monitor
- Model
- CASE IH AFS PRO 1200 Display LCD Display Screen
Review
Description
Trimble CASE IH AFS PRO 1200 Display LCD Screen Touch Screen Hmi Repair
Order each part separately is available

The Trimble CASE IH AFS PRO 1200 Display touch screen LCD Display Panel is designed for ease of use and high-performance mobility. Great for GIS applications—it's like bringing a complete PC out into the field. The big bright screen makes it easy to view and use detailed maps, and with more processing power, it is fast. Safeguard your data in the face of dust, sand, mud, humidity, and extreme temperatures. Collect information, capture photos, and communicate with headquarters, all with the assurance that your data is protected.
The Trimble CASE IH AFS PRO 1200 Display touch panel LCD Display hmi is built rugged from the inside out, with IP65 protection and military-grade MIL‑STD-810G certification for temperature, altitude, humidity extremes, vibration and shock the CASE IH AFS PRO 1200 Display LCD Screen panel glass hmi survives bitter cold, blistering desert heat, and everything in between.
Specifications:
The table below describes the parameters of the CASE IH AFS PRO 1200 Display LCD Display Screen Touch Screen.
| Part Number: | AFS PRO 1200 |
| Display Type: | STN |
| Warranty: | 365 Days |
| Input Power: | +24 VDC +/-20% |
| Storage Temperature: | -20°C to 60°C |
| Product Line: | Trimble Series |
Related Trimble Series Part No. :
| Trimble HMI | Description | Inventory status |
| GFX-1060 | Trimble Touch Screen Glass LCD Display Replacement | In Stock |
| CASE IH AFS PRO 1200 Display | Trimble Touch Panel Glass Replacement Repair | Available Now |
| GFX-1260 12.1 | Trimble Touch Screen Panel Repair Replacement | In Stock |
| GFX-750 | Trimble LCD Display Panel Touch Screen Monitor Replacement | Available Now |
| XCN-1050 121000 | Trimble LCD Screen Touch Digitizer Repair | In Stock |
| XCN-1060 134000 | Trimble HMI Touch Screen Organizer LCD Display Screen Replacement | In Stock |
| XCN-1260 137000 12.1 | Trimble Touch Panel Glass Replacement | In Stock |
| XCN-750 124000 | Trimble LCD Display Panel Touch Screen Panel Repair Replacement | Available Now |
| Trimble HMI | Description | Inventory status |
Trimble Series HMI Manuals PDF Download:
FAQ:
Question: How to install the Trimble CASE IH AFS PRO 1200 Display mount?
Answer: To install the Trimble CASE IH AFS Pro 1200 display mount, follow these steps:
Preparation
1. Gather Required Tools and Materials:
- Mounting bracket and screws (specific to the AFS Pro 1200)
- Power and data cables
- Tools for installation (screwdriver, wrench, etc.)
2. Select Installation Location:
- Choose a location in the vehicle that ensures good visibility and accessibility for the operator.
Installation Steps
3. Mounting the Display:
- Attach the mounting bracket to the selected location using the provided screws.
- Ensure that the bracket is securely fastened and can support the weight of the display.
4. Securing the Display:
- Carefully place the AFS Pro 1200 display onto the mounted bracket.
- Secure the display to the bracket as per the manufacturer's instructions, ensuring it is stable and does not wobble.
5. Connecting Power:
- Locate the power cable specific to the AFS Pro 1200.
- Connect the power cable to the display's power input.
- Ensure that your vehicle's electrical system can handle the power requirements of the display.
6. Connecting Data Cables:
- If applicable, connect any data cables from external devices (such as GNSS receivers) to their respective ports on the display.
- Ensure all connections are secure to prevent any signal loss.
7. Wiring Harness Installation:
- Route any additional wiring harnesses from the display to other necessary components, such as controllers or sensors.
- Use zip ties to secure loose wires and prevent them from interfering with vehicle operation.
8. Final Checks:
- Inspect all connections for tightness and security.
- Confirm that there are no exposed wires or loose components that could cause issues during operation.
9. Power On:
- Turn on your vehicle and power up the AFS Pro 1200 display.
- Follow any on-screen prompts for initial setup and calibration.
Post-Installation
10. Calibration and Configuration:
- After installation, calibrate the display according to your operational needs.
- Configure settings using the display interface as required for your specific applications.
For detailed instructions, refer to the [AFS Pro 1200 Reference Guide] or consult with your authorized dealer for assistance.