Troubleshooting Common Issues with Kawasaki Teach Pendant
- Share
- Issue Time
- Aug 12,2025
Troubleshooting Common Issues with Kawasaki Teach Pendant
Expert Solutions and Replacement Parts from Vicpas
Introduction to Kawasaki Teach Pendant
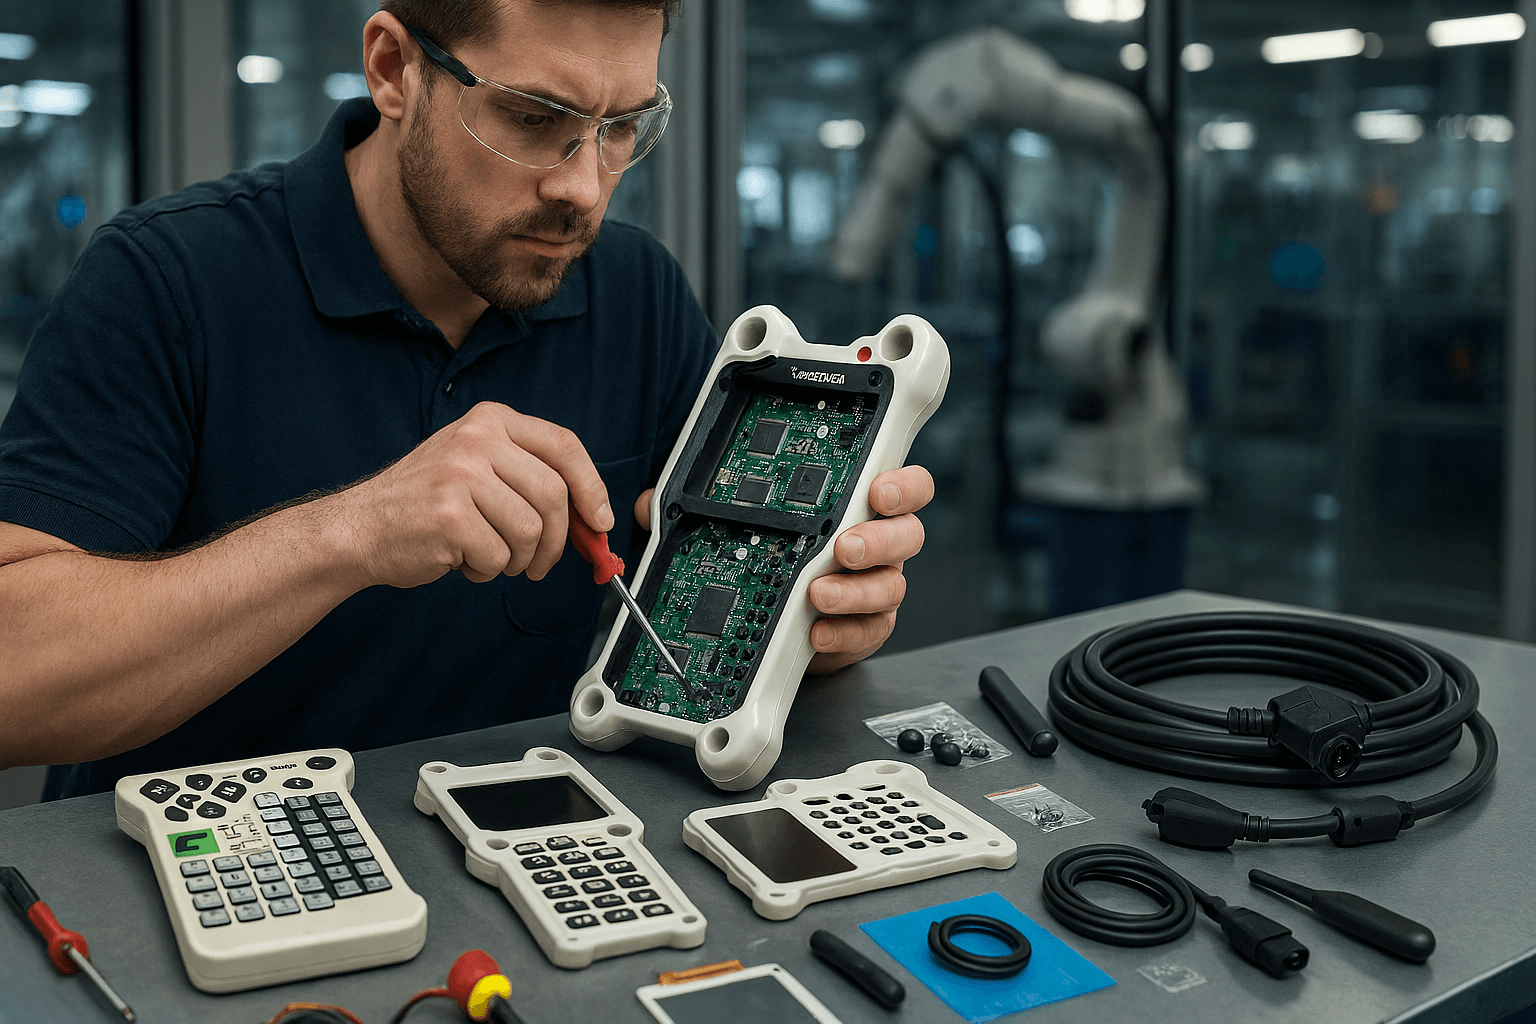
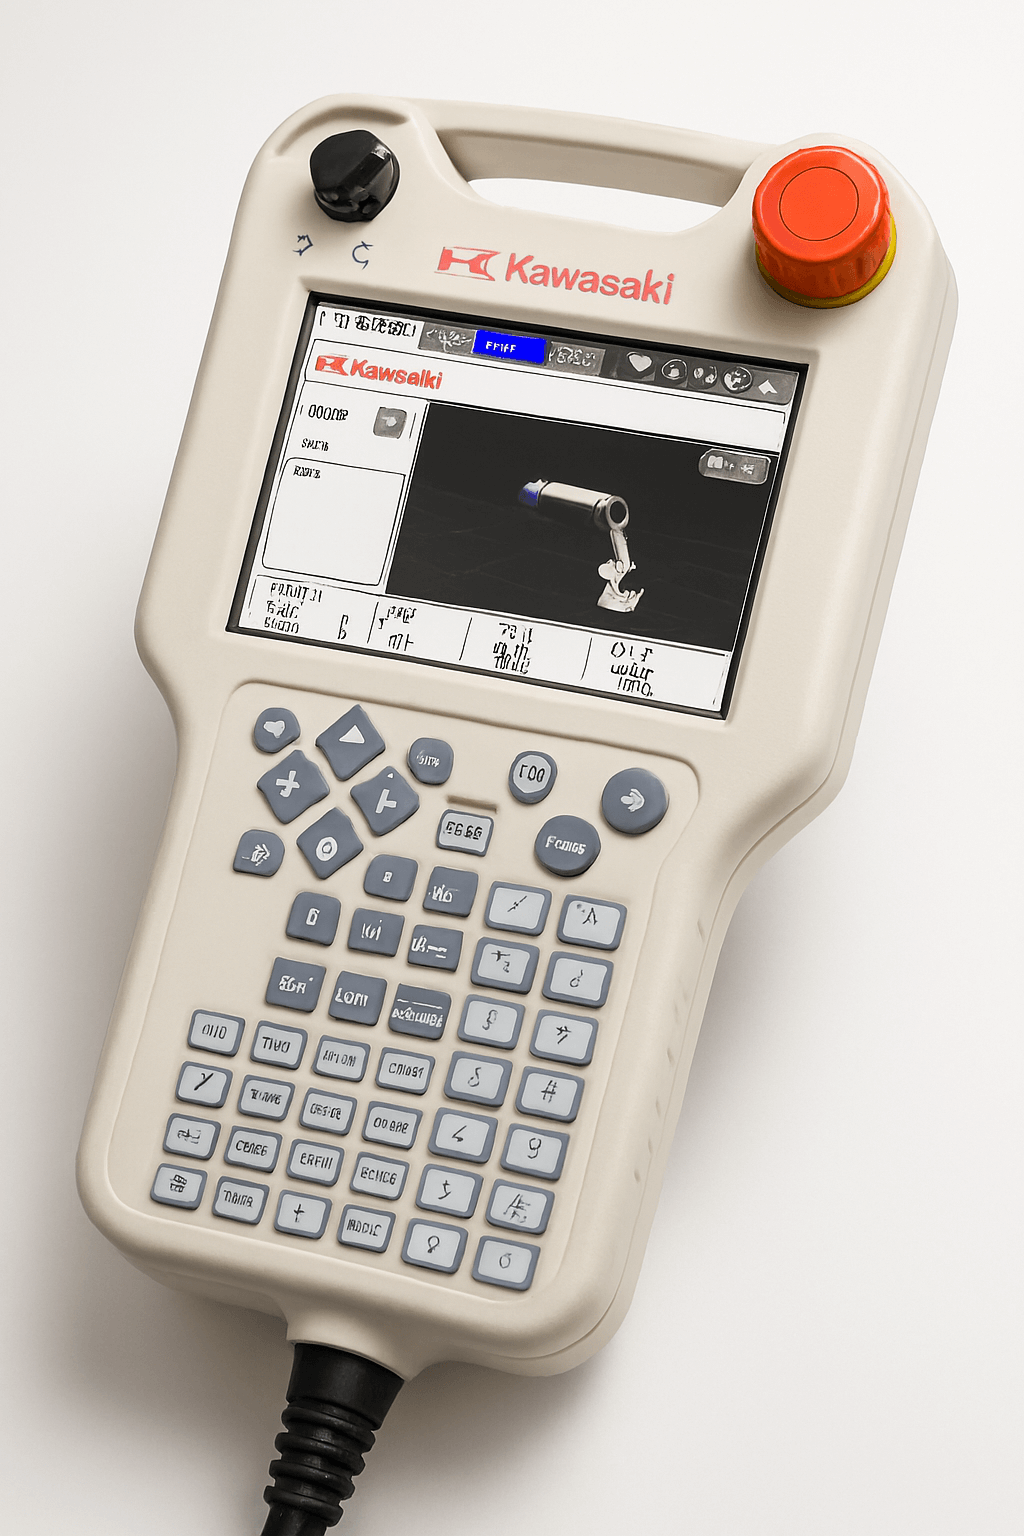
The Kawasaki Teach Pendant is a critical component for programming and operating Kawasaki robotic systems, widely used in industrial automation for tasks like welding, painting, and assembly. This intuitive device, equipped with a color LCD touchscreen and safety switches, allows operators to program and control robots with precision. However, like any sophisticated equipment, the Kawasaki Teach Pendant can encounter issues that disrupt operations. This guide, brought to you by Vicpas, a trusted supplier of Kawasaki Teach Pendant parts and repair services, covers common problems and their solutions to keep your robotic systems running smoothly.
Common Issues with Kawasaki Teach Pendant
Based on insights from Kawasaki manuals and community forums, here are the most frequent issues encountered with the Kawasaki Teach Pendant and how to address them:
1. Teach Pendant Fails to Power On
Symptoms:
The Teach Pendant does not display anything, and no lights or indicators are active.
Possible Causes and Solutions:
- Power Supply Issues: A common cause is insufficient voltage supply, typically +12 VDC, to the Teach Pendant. Check the power supply unit (AVR) for proper voltage output (e.g., 230V input). Ensure the AVR is correctly oriented and not damaged, as improper installation can lead to power failure.
- Defective Components: A faulty LCD panel, circuit board, or internal components may prevent the pendant from powering on. Inspect and replace defective parts, such as the 1HP board or power sequence card, if necessary.
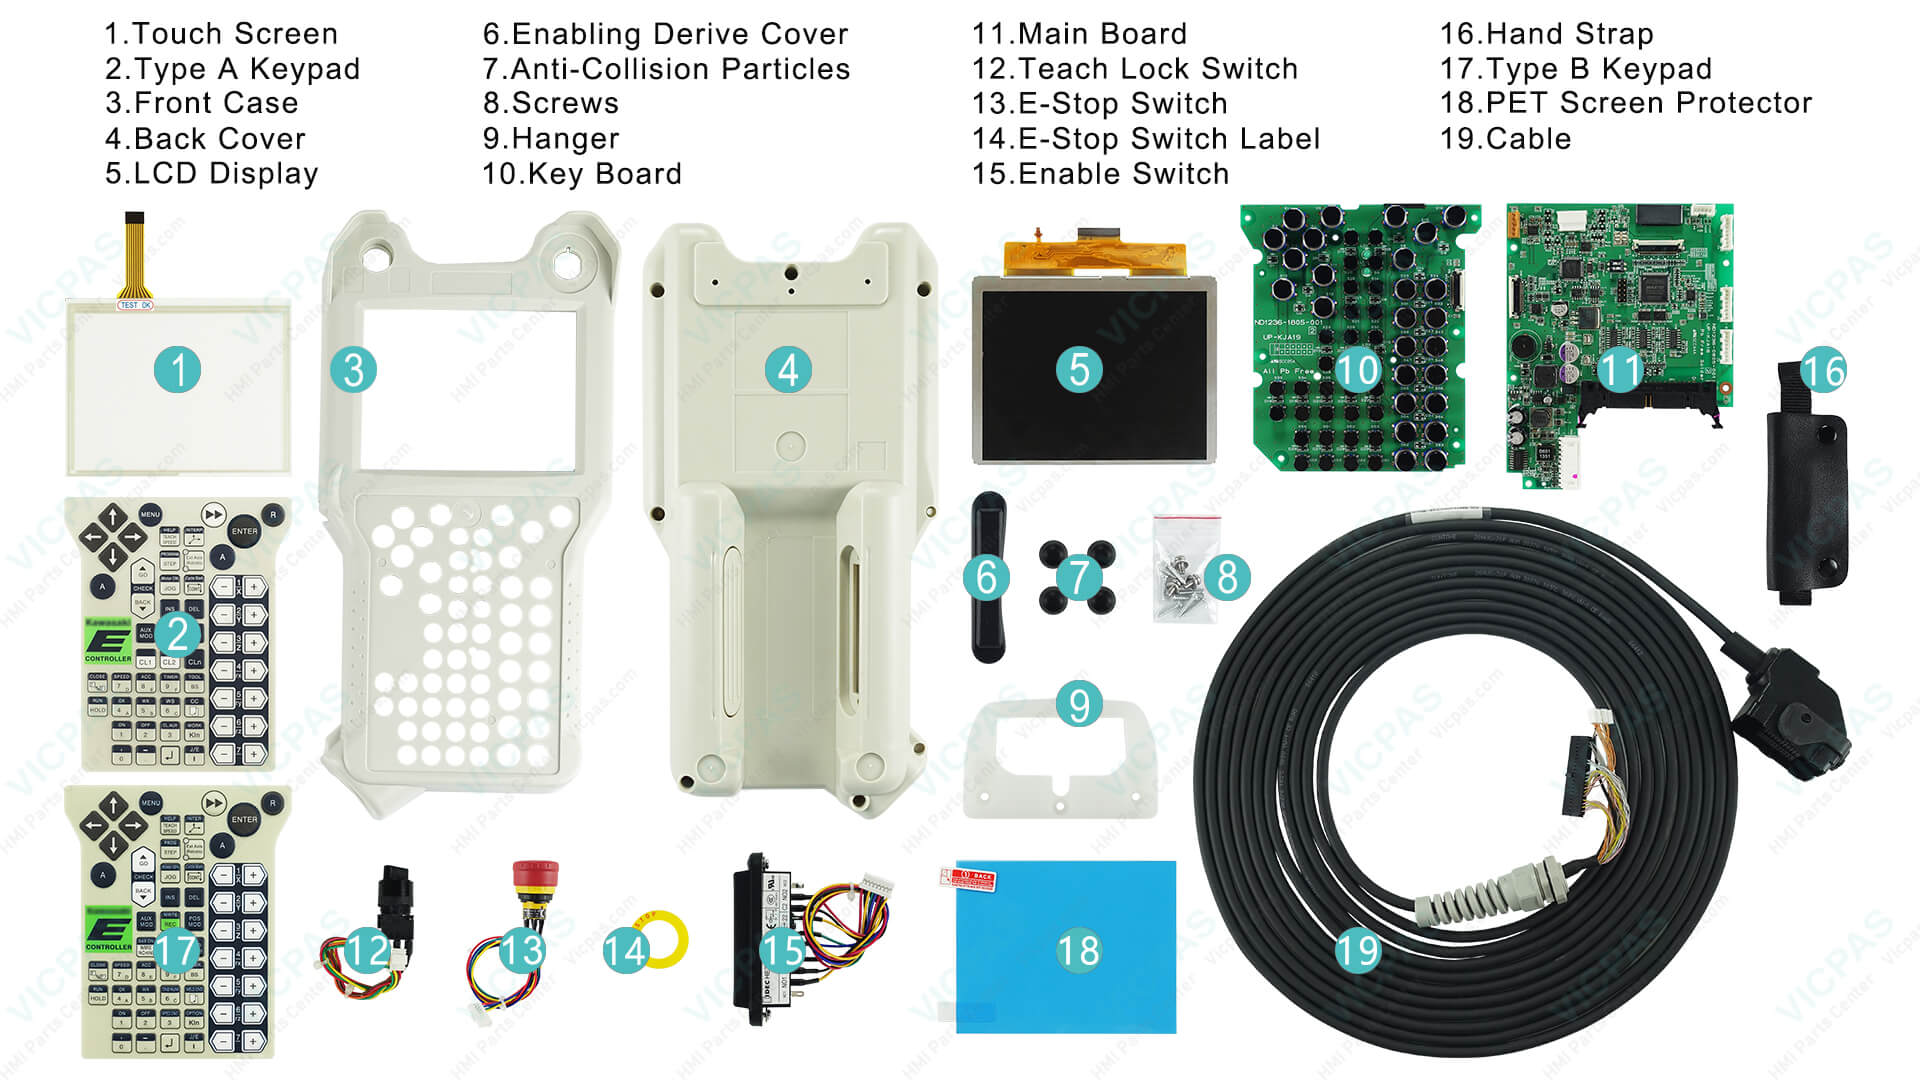
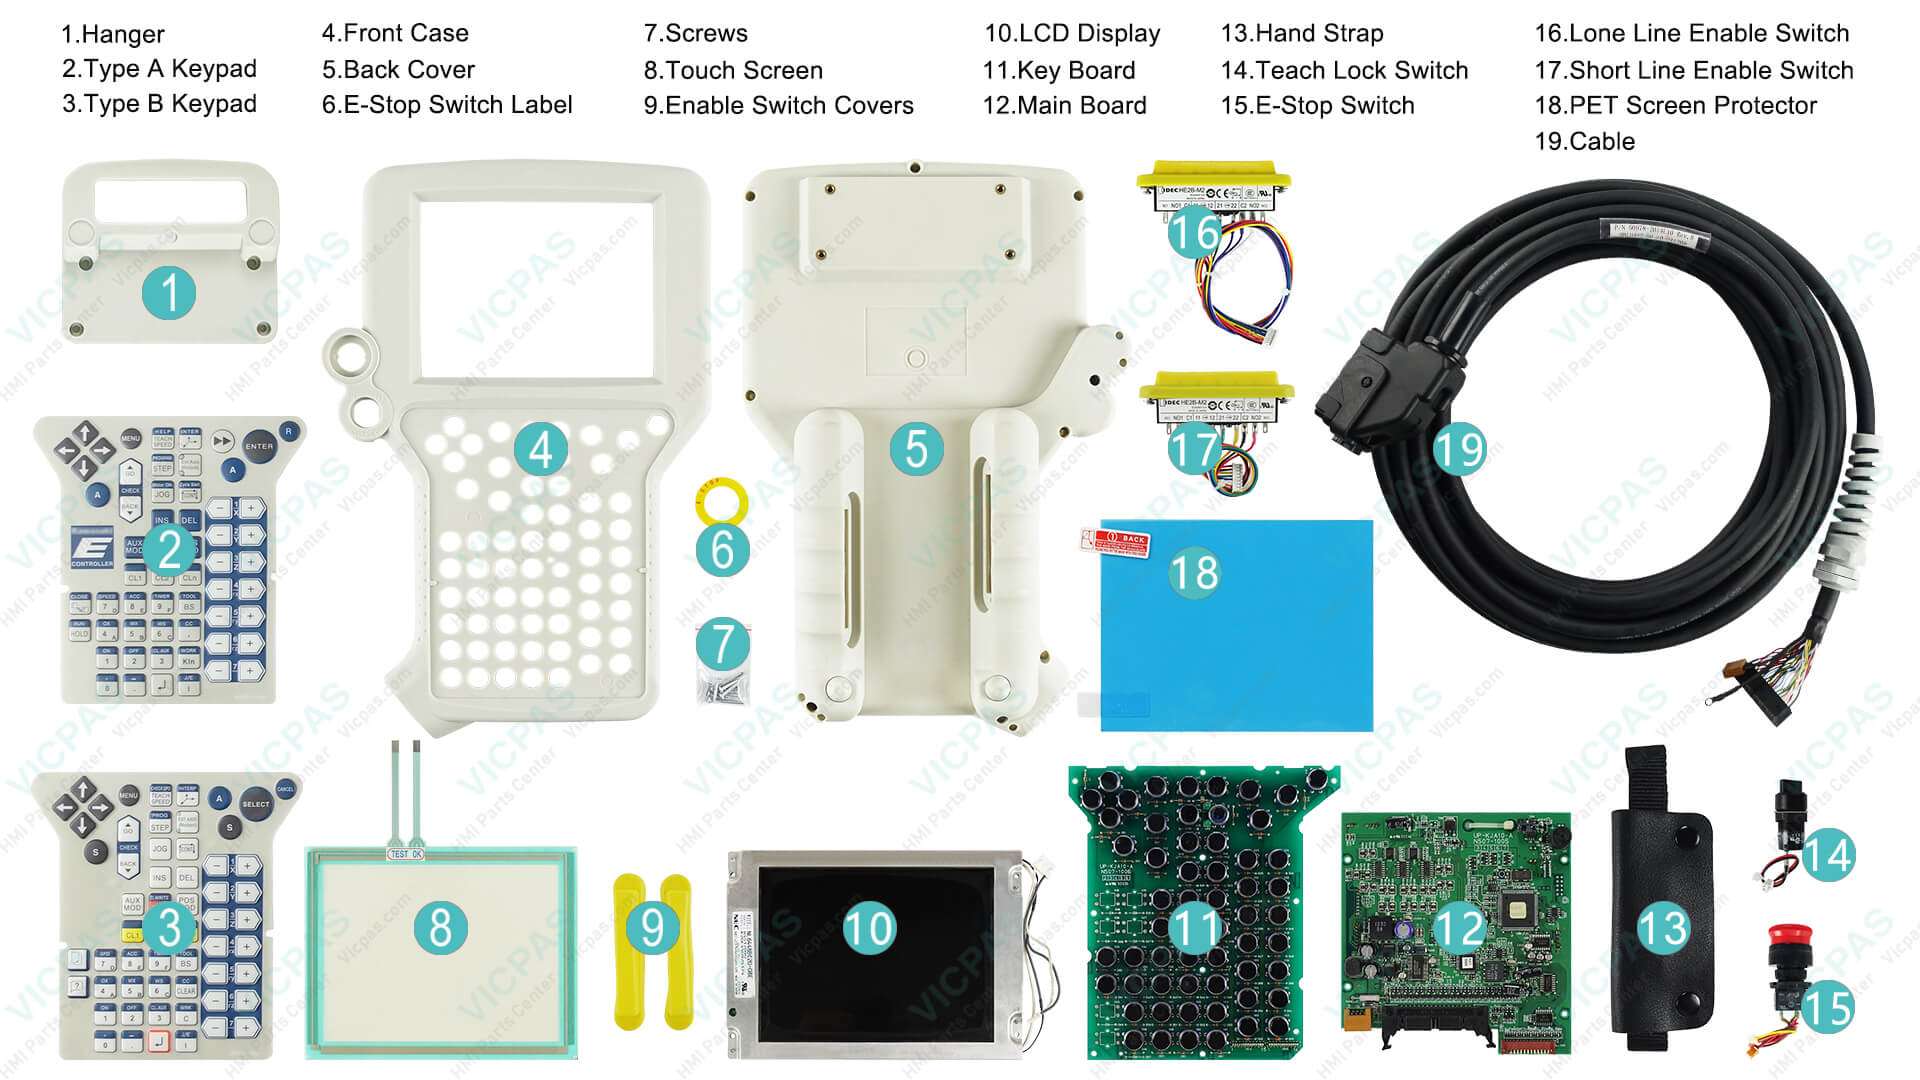
- Solution with Vicpas: Vicpas offers high-quality replacement parts for models like Kawasaki 50817-0091 and 50817-0092, including touchscreens, membrane keypads, and LCD displays, backed by a 1-year warranty. Explore our Kawasaki Teach Pendant parts for reliable replacements.
2. Disconnected or Short-Circuited Teach Pendant Cable
Symptoms:
The pendant shows intermittent connectivity or fails to communicate with the controller.
Possible Causes and Solutions:
- Cable Damage: A disconnected or short-circuited cable can disrupt communication. Inspect the teach pendant cable, especially the separate harness connecting the arm to the controller, for wear or solvent damage, which can cause earth faults. Replace damaged cables every 3-5 years as recommended.
- Connection Check: Verify connections at the pendant, panel, and internal harnessing. Ensure the X204 connector plug has pins 2 and 15 linked if not using external 24V power.
- Solution with Vicpas: Vicpas provides durable replacement cables and harnesses compatible with Kawasaki Teach Pendants, ensuring safe and reliable operation in harsh environments like paint booths. Browse our catalog for compatible parts.

3. Controller Boot Errors
Symptoms:
The controller fails to boot, or the Teach Pendant displays boot-related error messages.
Possible Causes and Solutions:
- Servo Board Issues: A damaged servo board (e.g., 1HW or 1GB) can prevent the controller from booting, affecting the Teach Pendant. Check for short circuits and replace faulty boards.
- Software Connectivity: Use KCWin32 to check if the controller is booting properly. If no connection is established, verify the main board and power supply functionality.
- Solution with Vicpas: Vicpas supplies replacement servo boards and main boards for Kawasaki controllers, ensuring compatibility and performance. Contact us for expert repair services or parts at Vicpas.
4. Teach Pendant Inactive or Locked
Symptoms:
The Teach Pendant is unresponsive, or the screen indicates it is in a locked state.
Possible Causes and Solutions:
- Teach/Repeat Mode Misconfiguration: Ensure the Teach/Repeat switch on the controller is set to TEACH and the teach lock switch on the pendant is ON. Restart the controller to activate the pendant.
- Emergency Stop Activation: If the pendant is disconnected, the emergency stop may be activated, rendering it inactive. Verify all connections and reset the emergency stop.
- Solution with Vicpas: Vicpas offers replacement E-stop switches, teach lock switches, and other critical components to restore functionality. Visit our product page for more details.
Preventive Maintenance Tips for Kawasaki Teach Pendant
To minimize downtime and extend the lifespan of your Kawasaki Teach Pendant, follow these preventive maintenance tips from Kawasaki manuals and Vicpas expertise:
- Regular Inspections: Check the pendant’s cable and protective tube for damage, especially in explosion-proof environments, to prevent short circuits or earth faults.
- Purge Explosive Gases: In paint booths, purge all explosive gases before powering the equipment and use a pressure detection device to monitor air pressure.
- Software Updates: Ensure the controller firmware is up to date (e.g., version 3.8.4 or later for Astorino robots) to avoid compatibility issues.
- Vicpas Support: Partner with Vicpas for high-quality replacement parts and repair services. Our inventory includes touchscreens, membrane keypads, and LCD displays for models like 50817-0065, 50817-0066, and more, all backed by a 365-day warranty. Learn more about Vicpas.

Why Choose Vicpas for Kawasaki Teach Pendant Repairs?
At Vicpas, we specialize in providing high-quality replacement parts and repair services for Kawasaki Teach Pendants, ensuring your robotic systems operate at peak performance. Here’s why Vicpas is your trusted partner:
- Comprehensive Inventory: We stock parts for various Kawasaki models, including 50817-0091, 50817-0092, 50817-0065, and more, ensuring quick delivery within 2-4 workdays.
- Quality Assurance: All our products, from touchscreens to E-stop switches, come with a 1-year warranty, guaranteeing reliability and durability.
- Expert Support: Our team offers technical guidance and repair services, helping you troubleshoot complex issues and restore functionality.
- Global Reach: Based in Guangzhou, Vicpas serves clients worldwide with flexible payment options like PayPal, T/T, and Western Union.
References
For more detailed guidance, refer to the following resources:
- Kawasaki Electrical Maintenance and Troubleshooting Manual
- Kawasaki E Controller Operation Manual
- Kawasaki Installation & Connection Manual (E-series)
- Kawasaki E-controller Installation & Connection (2021)
- Kawasaki T Series Controller Operation Manual
- Kawasaki E Series Troubleshooting Manual
- Kawasaki E0x Series Troubleshooting Manual
- Robot-Forum: Teach Pendant is Don't Work
- Robot-Forum: Controller Boot / Teach Pendant Cable / Boot Errors
- Kawasaki Teach Pendant Setup Tutorial (YouTube)
For hands-on support, watch our recommended Kawasaki Teach Pendant setup video to learn proper configuration techniques.